Grant Access
A complete guide to managing grant access
Managing grant access
When you first login to the Tonos admin page, you will be redirected to the Dashboards page. From here you have to go the Grant Access page, which is located in the Customer Management section.
Upon entering this section, the entirety of grant accesses you have created will be shown.
You can grant or revoke access to a client.
You can click the ellipses on a grant access to view information about the customer details.
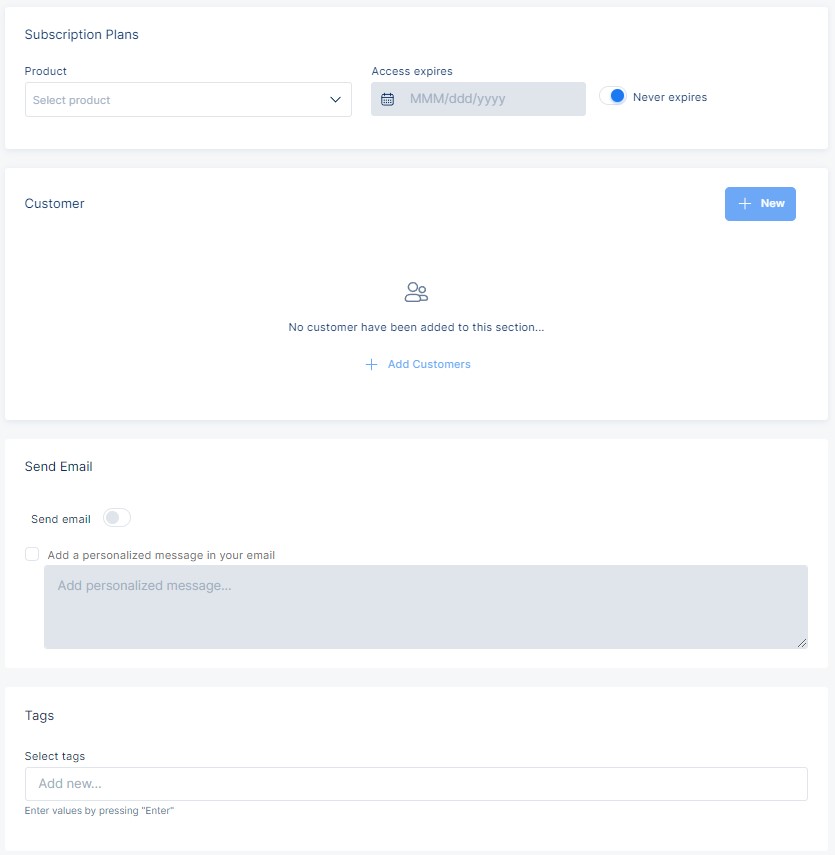
You can click the Grant Access button in order to create a new grant access.

Filling out the grant access form
| Field | Description |
|---|---|
| Product | This field requires you to select the product the customer will gain access to. |
| Access expires | This field allows you to select the expiration date of the granted access. |
| Never expires | This switch allows you to choose whether the user will have permanent access to the product. |
| Add customer | This button allows you to add a customer to the subscriptions list. |
| Send email | This switch gives you the option of sending an email to the customer. |
| Add a personalized message in your email | This checkbox allows you to add a message to the email you send to the customer. |
| Select Tags | This field allows you to select tags for grant access. |
Adding a customer to grant access
| Field | Description |
|---|---|
| Attach a file | This radio button allows you to attach a .txt file. |
| Enter the user’s email addresses by hand | This radio button allows you to write the user's email addresses yourself. You should write each email on a separate line. |