Customer Groups
When you first login to the Tonos admin page, you will be redirected to the Dashboards page. From here you have to go the Customers and the Customer Groups page, which is located in the Customer Management section. Doing so, you will have the following list view:
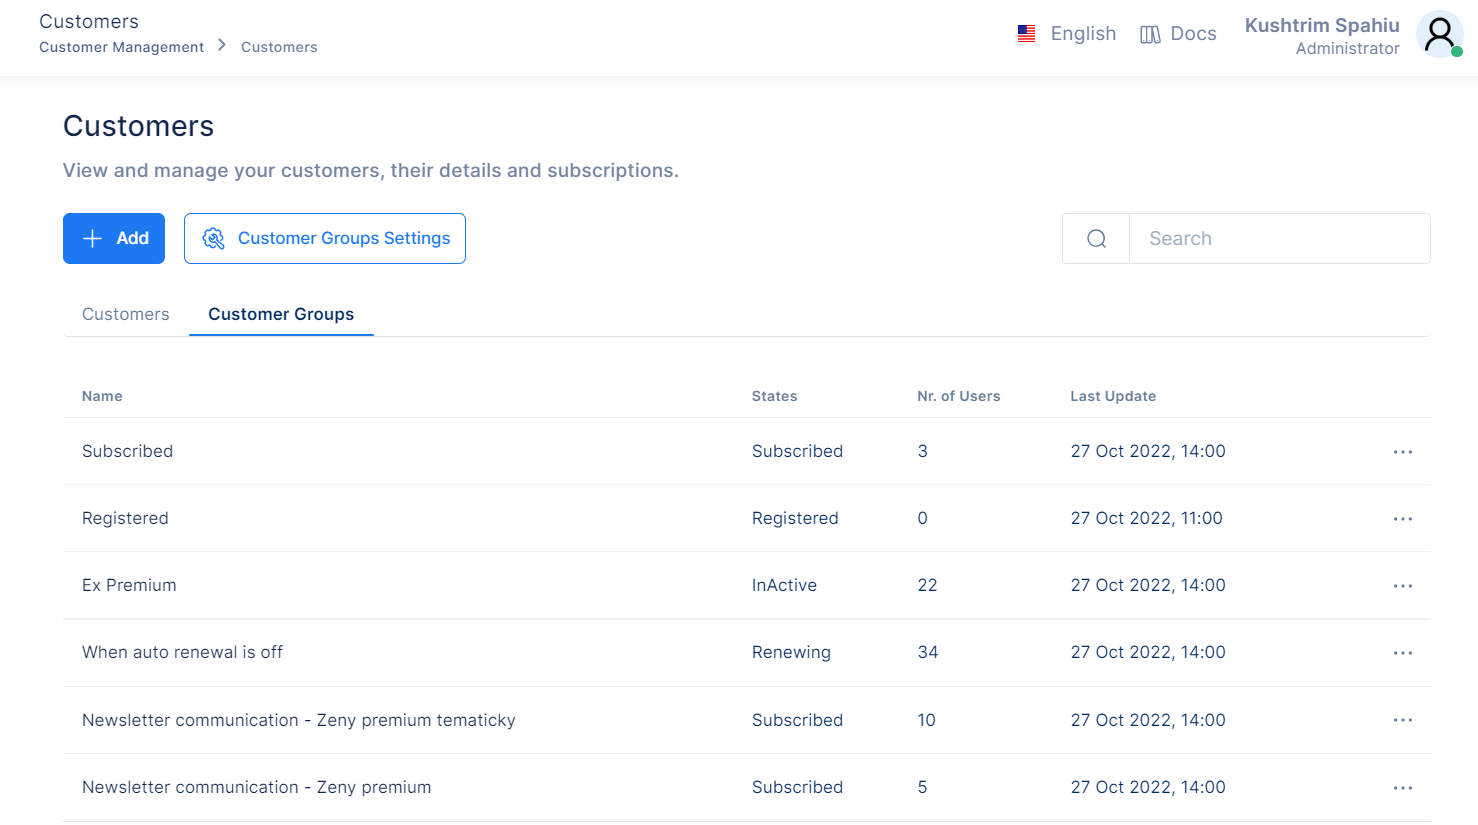
To add a new Customer Group you should click on the ‘Add’ button, after which a modal to Add a Customer Group will open. You will be required to fill out the Name field and Tonos Event(s) You will also have the option of choosing the Application(s), Product(s) and Subscription Plan(s).
On Tonos Event(s) dropdown list you will have these options: Registered, Subscribed, Renewing, Canceling, Expiring, Canceled, Expired and Inactive. The options you pick here will determine the users you target/include. Example: if you pick Registered and Subscribed, you will see all the registered and subscribed users in your organization. If you would like to further filter them, you can choose your Registered and Subscribed users in specific Applications/Products/Plans.
After you have finished filling out the form you click on Create and the Customer Group will be added as seen in the image below.
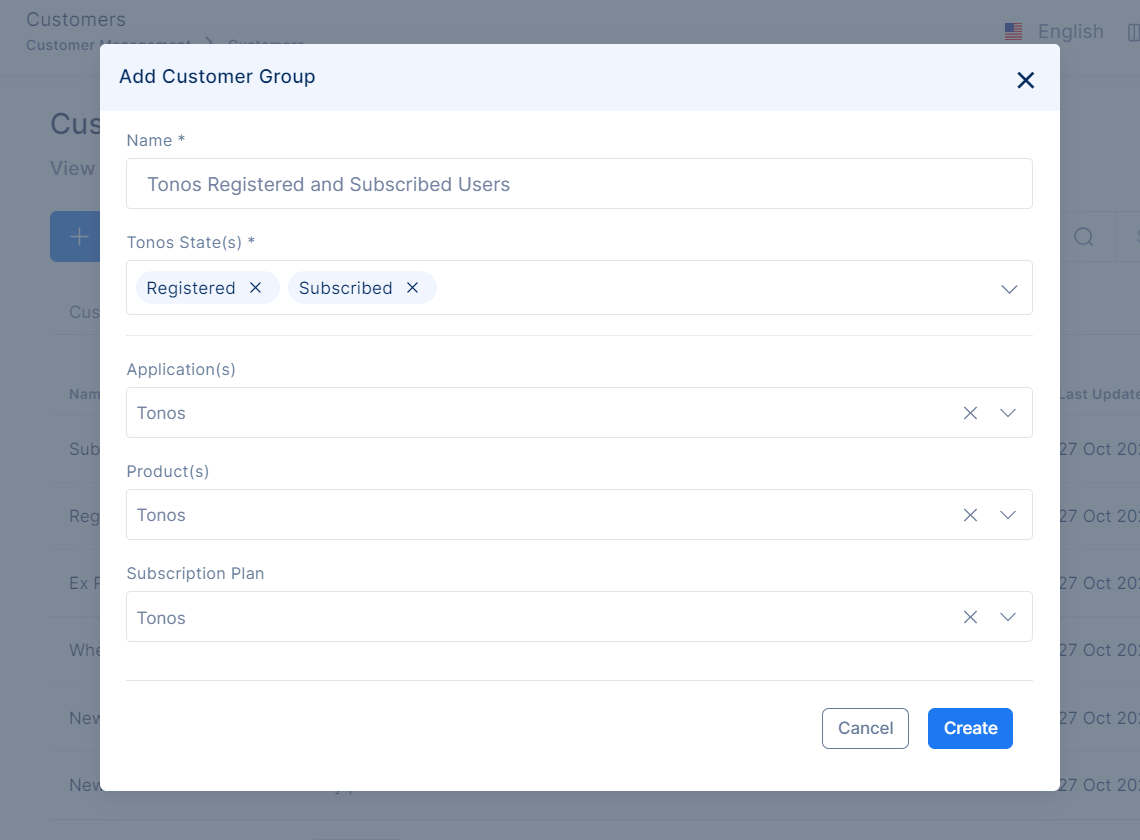
The table below provides information on how to set up a customer group.
| Field | Description |
|---|---|
| Name | This field requires you to write the name of your new customer group. |
| Tonos Events | This field requires you to select the Tonos Event/s to be used to group the customers. The entirety of available Tonos Events will be displayed when selecting. |
| Select Timing Event | This field gives you the option to determine the timing of when an update to the group is triggered. The two options include: Before - n number of days before the event is expected to occur, and After - n number of days after the event has occurred. You can also manually enter number of days (must be a digit input). If the event is subscription: created or subscription: updated the Before option will not be displayed because these events can only be triggered after they occur. If you do not determine the timing, the list will be updated on an event occurance. |
| Application(s) | Select the Application(s) for which the mailing list group is being created (optional). If a specific application is selected, Subscription Plans and Products sections will only display the plans and products of that application. You can only select one application at a time, but you mau select multiple applications. |
| Product(s) | Select the products for you mailing lists. The products shown to you will depend on the application filter. |
| Subscription Plan | Select the subscription for you mailing lists. The subscription plans shown to you will depend on the application filter. |
Customer Groups Settings
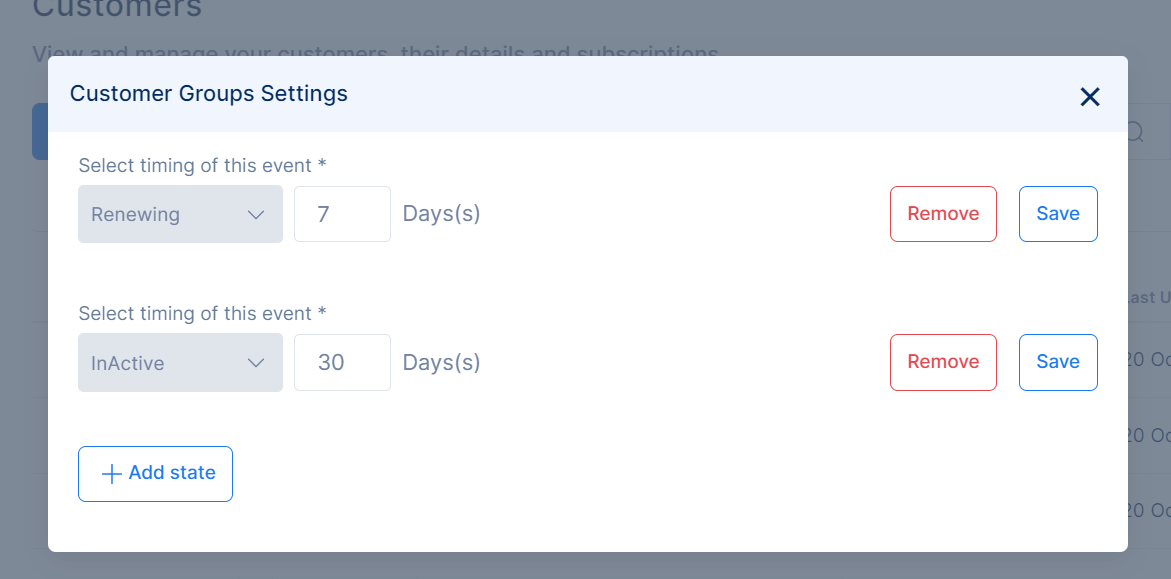
After creating a Customer Group, to further filter its users/members you can use Customer Group Settings. Navigate to ‘Customer Groups Settings’, next to ‘Add’. Here you will have the option to select the timing of the event and to enter the specific number of days. You can select 3 states here: Renewing, Expiring, and Inactive and then specify the number of days.
Example: if you pick Renewing and 7 days, it will include all users whose subscription will renew within the next 7 days.
Customer Groups Actions
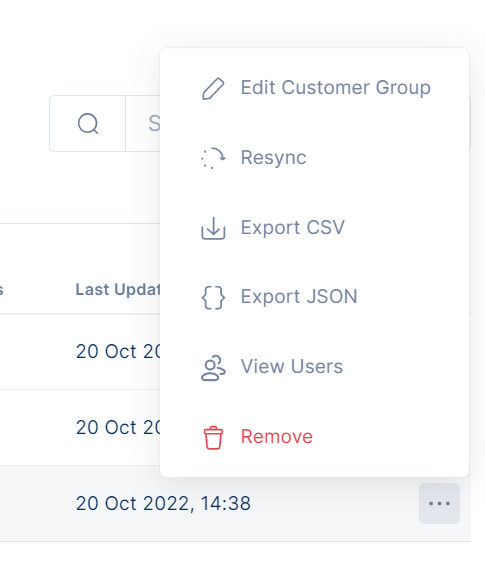
After you have created a Customer Group, go to Actions and you will see 6 options. You can Edit and Remove a Customer Group. You have the option to Resync it, which means it will check for any updates on Number of Users and update it within 0-5 minutes.
You can also Export CSV. This will export a file with the Customer Group’s users’ Order Number, Email, and Signup Date. The same functionality is provided at View Members.
Note that if a user is no longer part of the Customer Group, it will automatically be removed (example: the user was a subscriber at the time of the Customer Group creation, but it is no longer part of it, they have canceled their subscription, it has expired or some other reason).
The last option is to Export JSON. Here you will export a file with Customer Group’s users’ Id, Order Number, Email, and Signup Date.
Customer Groups and Smart Emailing
To add a Customer Group to your SmartEmailing’s Mailing List follow these steps:
Under ‘Integrations’ go to ‘Email Providers’. Go to your Smart Emailing Email Provider’s Actions and click on ‘Configure Settings’. Here you will see ‘Mailing List Settings’ and an Add button to add the Customer Group to your mailing list (see picture below).
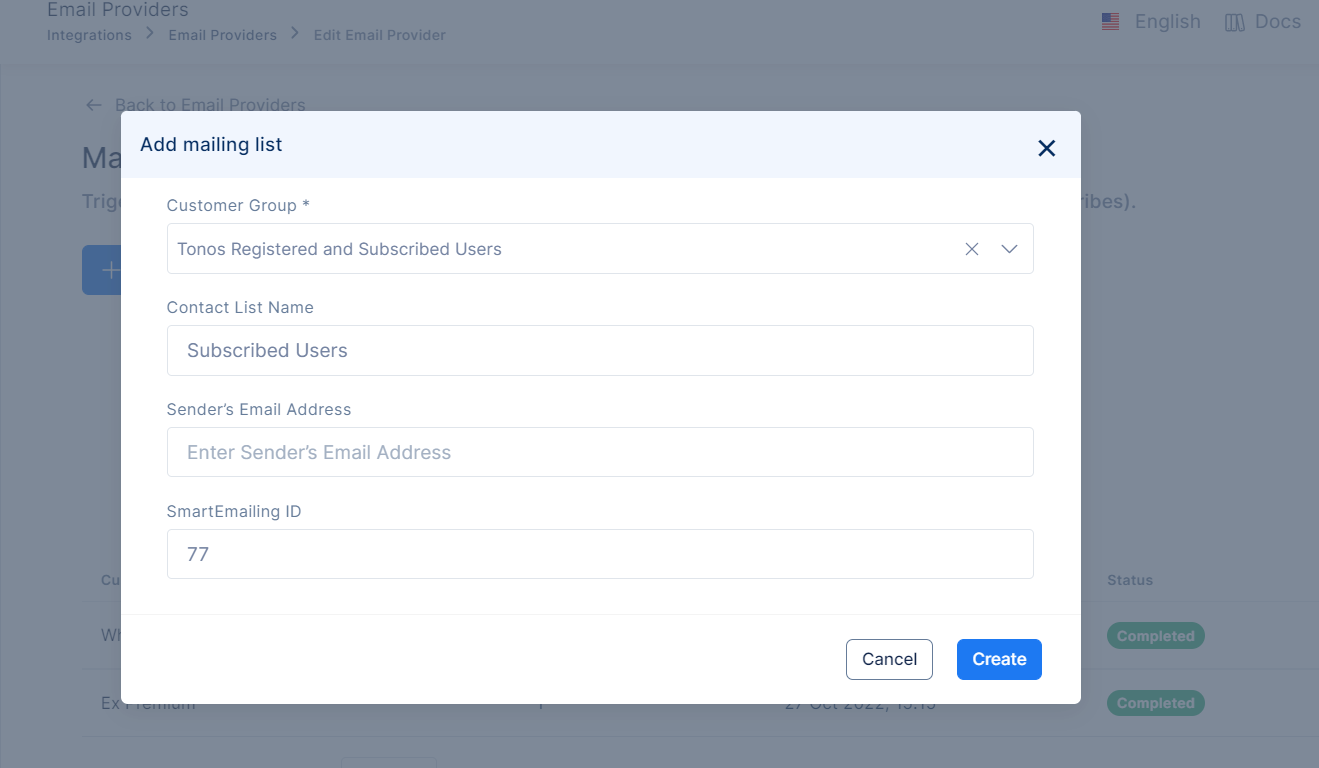
After you fill out the required fields, you will see the Customer Group added to the list.